Valorant Agent Abilities: A Comprehensive Guide (2025)

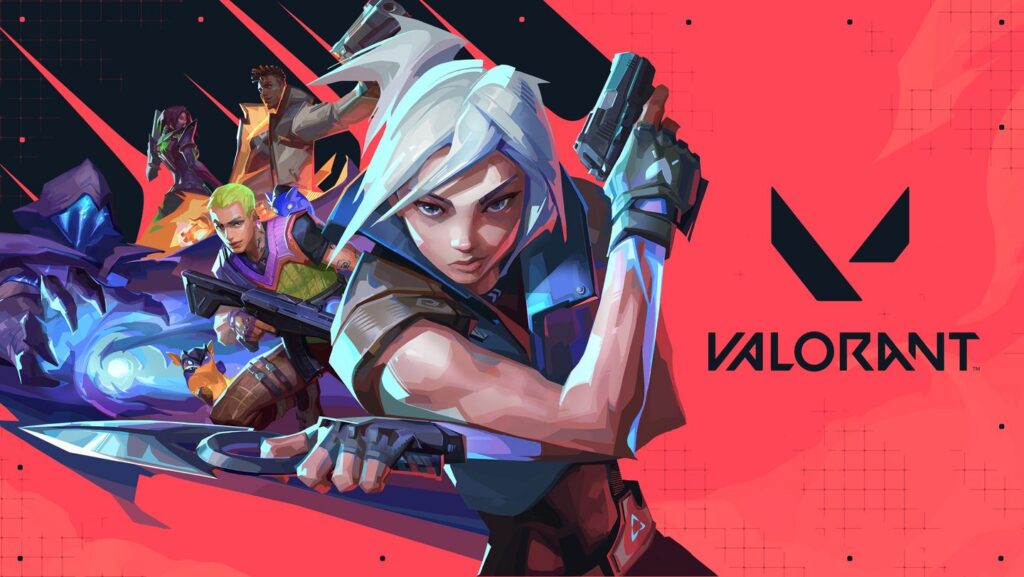
Valorant, Riot Games’ tactical first-person shooter, has become a staple in the competitive gaming scene, combining precise gunplay with unique character abilities. At the core of the game is its diverse roster of Agents, each with their own set of abilities that can shape the battlefield and turn the tide of battle. Whether you’re a beginner or a seasoned player, understanding these Agent abilities is crucial to mastering Valorant and climbing the ranks.

Below, we’ll break down every Agent’s abilities (as of 2025), provide tips and tricks for optimal usage, and explore how to synergize them with your team for maximum impact.


Duelists: The Frontline Fraggers

Duelists are the damage dealers in Valorant, designed to initiate fights and secure kills. They are ideal for aggressive playstyles.

Jett

  • Cloudburst: Throw a smoke that can be steered in the air. Use it to obscure vision during fast pushes or to create safe escapes.
  • Updraft: Propels Jett upward, allowing her to reach high places or evade danger. Great for surprising opponents.
  • Tailwind: A rapid dash in the direction Jett is moving. Use this to reposition quickly or dodge enemy fire.
  • Blade Storm (Ultimate): Equips throwing knives that deal precise damage and refresh on a kill. Best used in eco rounds or when you need pinpoint accuracy.

Pro Tip: Jett excels at flanking and surprising enemies. Combine her mobility with quick entries into chokepoints or to bait out enemy utility.


Phoenix

  • Blaze: Creates a wall of fire that blocks vision and damages enemies. Phoenix can curve this wall for creative angles.
  • Curveball: A flashbang that curves around corners. Perfect for blinding enemies before pushing into a site.
  • Hot Hands: A fireball that deals damage in its radius but heals Phoenix. Use it to heal up during firefights.
  • Run It Back (Ultimate): Allows Phoenix to respawn at the cast location if killed during the ultimate. Use it to take high-risk engagements.

Pro Tip: Use Phoenix’s flashes to clear tight corners and play aggressively when his ultimate is active, as it essentially gives you a free life.


Raze

  • Boom Bot: Deploys a robot that chases enemies and explodes. Use it to clear corners or gather intel.
  • Blast Pack: An explosive satchel that deals damage and can propel Raze for movement tricks.
  • Paint Shells: A cluster grenade that deals massive damage. Perfect for clearing out groups or forcing enemies out of cover.
  • Showstopper (Ultimate): A rocket launcher that deals devastating AoE damage. Best used in close-quarter engagements or to clear out contested areas.

Pro Tip: Use Raze’s Blast Pack for double jumps to access unexpected angles, catching enemies off guard.


Initiators: The Team Enablers

Initiators excel at creating opportunities for their team by gathering intel and disrupting enemy setups.

Sova

  • Recon Bolt: Fires a bolt that reveals enemies within its line of sight. Best used to scout areas before a push.
  • Owl Drone: A controllable drone that marks enemies it spots. Use it to safely gather intel on enemy positions.
  • Shock Bolt: Fires an explosive arrow that deals AoE damage. Perfect for breaking utility or damaging hiding enemies.
  • Hunter’s Fury (Ultimate): Fires three powerful energy beams across the map, dealing damage and revealing enemies hit.

Pro Tip: Learn lineups for Sova’s Recon and Shock Bolts on every map to maximize his utility and support your team effectively.


KAY/O

  • FRAG/ment: A grenade that sticks to the floor and deals damage over time. Use it to flush enemies out of cover.
  • FLASH/drive: A flash grenade that can be thrown underhand or overhand. Effective for initiating pushes.
  • ZERO/point: A suppression knife that disables enemy abilities. Great for denying defenders their utility.
  • NULL/cmd (Ultimate): KAY/O becomes an empowered combatant, revivable by teammates if downed, while emitting suppression pulses.

Pro Tip: Use ZERO/point to clear critical areas, such as chokepoints or bomb sites, before committing to a push.


Sentinels: The Defenders

Sentinels are defensive specialists, perfect for locking down areas and supporting teammates.

Cypher

  • Spycam: A camera that can mark enemies with tracking darts. Place it in hard-to-spot areas for constant surveillance.
  • Cyber Cage: Traps that slow enemies passing through them. Use it to block entries or catch enemies off-guard.
  • Trapwire: Deploys a tripwire that reveals and dazes enemies. Place it in common pathways for maximum effectiveness.
  • Neural Theft (Ultimate): Reveals the location of all living enemies after marking a dead body.

Pro Tip: Cypher thrives on information. Use his traps and Spycam to relay intel to your team, especially on defense.


Sage

  • Barrier Orb: Creates a large wall that can block paths or provide cover. Can be rotated for precise placement.
  • Slow Orb: Slows enemies in its radius. Use it to control enemy movement or delay pushes.
  • Healing Orb: Heals yourself or a teammate. Time it carefully during fights.
  • Resurrection (Ultimate): Revives a fallen teammate. Best saved for high-value targets like Duelists or Initiators.

Pro Tip: Use Sage’s wall creatively to boost yourself or teammates to unexpected positions.


Controllers: The Strategic Smokers

Controllers focus on blocking vision and controlling areas of the map.

Omen

  • Shrouded Step: Teleport a short distance. Use it to reposition or escape danger.
  • Paranoia: Sends a shadow projectile that nearsights enemies. Perfect for initiating pushes.
  • Dark Cover: Deploys smoke orbs to block vision. Use them to cut off sightlines and confuse enemies.
  • From the Shadows (Ultimate): Teleport anywhere on the map. Use it for flanks or to gather intel.

Pro Tip: Fake Omen’s ultimate to bait out enemy rotations or utility.


Astra

  • Stars: Place stars on the map that can be activated as smokes, stuns, or gravity wells. Requires map awareness and planning.
  • Nova Pulse: Stuns enemies in the radius of a star. Great for stopping pushes.
  • Gravity Well: Pulls enemies toward the center, leaving them vulnerable.
  • Cosmic Divide (Ultimate): Creates a wall that blocks bullets and dampens sound. Perfect for splitting sites during executes.

Pro Tip: Astra requires coordination. Communicate with your team to get the most out of her utility.


Viper

  • Snake Bite: Deploys a pool of acid that damages enemies over time. Great for blocking plant or defuse attempts.
  • Poison Cloud: Creates a smoke cloud that drains fuel. Use it to block vision or stall pushes.
  • Toxic Screen: A long wall of toxic gas. Use it to block multiple sightlines at once.
  • Viper’s Pit (Ultimate): Creates a large toxic cloud that heavily obscures vision. Best used to hold or retake sites.

Pro Tip: Manage Viper’s fuel carefully, as overuse of her abilities can leave you vulnerable.


General Tips for Mastering Agent Abilities

  • Experiment: Don’t stick to just one Agent. Learning multiple Agents helps you adapt to different team compositions and maps.
  • Communication is Key: Use abilities in sync with your teammates for maximum impact.
  • Study Pro Play: Watch competitive matches to learn creative uses of abilities.
  • Practice in Custom Games: Test lineups, smokes, and ability placements to improve your efficiency.

Want to master Valorant or share your strategies? Join the Valorant group on Absurd.link to connect with other players, exchange tips, and discuss the latest updates. Together, we’ll dominate the battlefield!

Stardew Valley Fishing Tips

Struggling to reel in the big catches in Stardew Valley? You’re not alone—fishing can be a bit tricky at first. It’s also one of the most relaxing and rewarding parts of the game once you get the hang of it. Here are some handy tips to help you level up your fishing skills and start hauling in those coveted catches.

Practice Makes Perfect

Fishing is like any other skill in Stardew Valley—it gets easier the more you do it. Spend time in different spots around Pelican Town, the Cindersap Forest, and even the new Ginger Island (introduced in the 1.5 update). Each location features a variety of fish, and trying them all out is a great way to sharpen your reflexes.

Watch for the Exclamation Mark

When you see the exclamation mark appear above your character’s head, get ready to click and hold. That begins the mini-game where you keep the fish icon inside the green bar. Quick taps work better than long presses in most cases, especially if the fish is darting around. If it’s a slower fish, gentle presses help you stay on track.

Upgrade Your Gear

A better fishing rod dramatically increases your chances of success. Here’s a quick rundown of what’s available at Willy’s Fish Shop:

  • Bamboo Pole: The starter rod, handy for learning the basics.
  • Fiberglass Rod: Lets you use bait, which helps you get bites faster.
  • Iridium Rod: Allows both bait and tackle, giving you a huge advantage when it comes to reeling in difficult fish.

Keep an eye out for tackle like Trap Bobbers (slows the fish’s escape) or Spinner (increases the bite rate). They can be game-changers when you’re chasing rarer fish.

Boost Your Fishing Skill With Food

Before you head to the water, consider grabbing some food that provides a fishing buff. Dishes like Trout Soup, Dish O’ The Sea, or Seafoam Pudding can temporarily raise your fishing level, making those harder catches more manageable. You can buy some of these from Willy or the Saloon, or cook them yourself once you have the recipe and ingredients.

Fish at the Right Spots and Times

If your TV forecast suggests certain locations or weather patterns, pay attention—some fish only appear at certain times of day, in specific seasons, or under certain conditions. The Beach Farm (also introduced in Version 1.5) offers new water areas with unique fish possibilities, and Ginger Island has exclusive fish you won’t find anywhere else. Being in the right spot at the right time can really boost your variety and profits.

Legendary Fish Hunts

As you level up, you’ll be ready to take on legendary fish. These special catches appear in set locations and seasons, and they’re much harder to reel in. Don’t be discouraged if you lose them at first—it might take several tries or some extra equipment like a high-quality rod and a strategic tackle.

Explore Ginger Island

Once you unlock Ginger Island, you’ll have even more fishing spots to explore, including hidden areas and pirate-themed locations. Some special fish and treasure can only be found there. You’ll also discover new quests that reward you for catching exotic fish, so it’s worth the journey.

Try the Submarine at the Night Market

Every Winter (15th–17th), the Night Market sets up at the beach. One of the best hidden gems is the submarine ride, where you can fish for unique deep-sea creatures. It’s a fun little mini-adventure within the game, and the fish you’ll catch there tend to fetch a decent price.

Don’t Forget to Relax

It’s easy to get frustrated when a fish keeps escaping, but part of the charm of fishing in Stardew Valley is the calm, repetitive rhythm. Enjoy the sound of the waves or the river flowing past, and don’t stress too much if you lose a tough catch. The more you stick with it, the easier it becomes—and you’ll appreciate those big wins even more.


Whether you’re just starting out with a Bamboo Pole or pushing for legendary fish on Ginger Island, these tips will help you reel in the best catches Stardew Valley has to offer. Happy fishing, and good luck out there!

Rediscovering the Wild West: Why Red Dead Redemption Remains a Masterpiece

Red Dead Redemption has captivated gamers for years, transporting them to the heart of the American frontier with its expansive open-world gameplay and deeply immersive storytelling. Developed by Rockstar Games, this groundbreaking title allows players to experience the Wild West in all its gritty glory, complete with rolling plains, bustling frontier towns, and treacherous mountain passes.

Immersive Environments and Dynamic Weather

One of the most remarkable elements of Red Dead Redemption is how meticulously it recreates the sights and sounds of the Old West. As you explore the enormous map, you’ll travel through regions filled with dust-choked deserts, towering snowy peaks, and lush river valleys. Changing weather conditions—not just the occasional downpour, but also dramatic thunderstorms or heavy snowfall—heighten the sense of realism. These environmental factors can influence gameplay by slowing travel or making certain missions more challenging, reinforcing the idea that you’re truly a rugged outlaw braving the untamed frontier.

Authentic Characters and Storylines

Venture into a frontier town and you’ll encounter a diverse cast of characters, from grizzled lawmen and friendly shopkeepers to roving bandits and charismatic outlaws. Every interaction you have shapes your story, reflecting the moral choices you make as you progress. The narrative is crafted around themes of redemption, loyalty, and survival, making every mission feel vital and personal. This emotional core keeps players invested in the fate of the protagonist and the many allies and adversaries they meet along the way.

Historical Accuracy and Cultural Context

Part of what sets Red Dead Redemption apart is its nod to historical authenticity. The attire, weaponry, and social issues depicted in the game offer snapshots of life in the early 1900s. Characters grapple with changing technologies—like the rise of automobiles and the spread of telegraph lines—and shifting social landscapes, adding a layer of depth that’s often missing in other action-adventure titles. This careful attention to detail provides an educational glimpse into the challenges and complexities of the era.

Red Dead Redemption 2 and Ongoing Updates

The series expanded significantly with the release of Red Dead Redemption 2, a prequel that introduced an even larger open world, more detailed animations, and a deeper focus on character development. While the original game remains iconic, the sequel’s robust story mode and online multiplayer (Red Dead Online) give fans fresh ways to roam the frontier with friends or strangers across the globe. Rockstar continues to support these titles with ongoing updates that fine-tune gameplay mechanics and introduce new content. As of 2023, Red Dead Redemption is accessible on more platforms, making it easier than ever for newcomers to experience the classic title.

Join the Community on Absurd.link

Whether you’re discovering the Old West for the first time or revisiting it after years away, Red Dead Redemption continues to shine as a benchmark for open-world design and storytelling. Its timeless appeal lies in its ability to blend historical accuracy, emotional depth, and breathtaking adventure. If you’re eager to connect with other fans, share your own in-game escapades, or dive deeper into the lore, be sure to join the Red Dead Redemption group on Absurd.link. There, you’ll find fellow enthusiasts who are just as passionate about exploring the frontier and uncovering the many secrets of the Wild West.

Terraria Boss Guide (2024 Edition): Strategies, Tips & Tactics for Every Boss

If you’re looking for the most up-to-date strategies and pro-level tips to conquer every boss in Terraria, you’ve come to the right place. Whether you’re just starting out or you’re a seasoned veteran aiming to fine-tune your tactics, this comprehensive guide will help you dominate every boss battle Terraria throws at you. We’ve included recent changes, community-driven strategies, and general pointers so you can always stay one step ahead of these formidable foes.

Why Focus on Boss Battles?
Boss fights in Terraria aren’t just milestones; they’re transformative moments that mark your progression through the game’s various stages. Each victory unlocks new crafting materials, access to advanced areas, and gear upgrades that push you closer to the ultimate endgame. By mastering boss fights, you’re effectively mastering Terraria itself—gaining power, confidence, and a whole new appreciation for this ever-evolving sandbox adventure.

So gear up, Terrarians! Let’s break down each boss by order of appearance and difficulty, including essential tips, recommended weapons, armor sets, and arena setups. Then, we’ll point you toward our awesome Terraria community on Absurd.link—the gamer social network—where you can share your victories, ask questions, and dive deeper into these epic battles.


Pre-Hardmode Bosses

1. King Slime

  • Where & When: Can be summoned via a Slime Crown or appear randomly during a Slime Rain event.
  • Tips & Tricks:
    • Mobility is Key: Use platforms to stay above ground. King Slime’s main threat is crowding you with smaller Blue Slimes.
    • Early-Game Gear: A good bow with Jester’s Arrows or a basic sword will do. Ninja gear helps if you’ve acquired it from the Goblin Tinkerer.
    • Arena Setup: A couple of wooden platforms stacked above the ground lets you easily dodge his hops.

2. Eye of Cthulhu

  • Where & When: Spawns after you reach 200 HP and 10+ defense, or summon with a Suspicious Looking Eye at night.
  • Tips & Tricks:
    • Phase Changes: In its second phase, it attacks more aggressively. Save healing potions for this frenzy.
    • Recommended Gear: The Gold/Platinum Bow with Flaming Arrows is a classic choice. Later updates made early-game ores more accessible, so you can upgrade to Tungsten or even Crimtane weapons if possible.
    • Arena Setup: Build a runway of wood platforms and add campfires and heart lanterns. Mobility accessories like Cloud in a Bottle or Hermes Boots help you outrun its dash attacks.

3. Eater of Worlds (Corruption) / Brain of Cthulhu (Crimson)

  • Where & When: Summoned by breaking 3 Shadow Orbs (Corruption) or 3 Crimson Hearts, or by using the Worm Food/Bloody Spine items.
  • Eater of Worlds Tips:
    • Piercing Weapons: Use weapons that pierce multiple segments (Vilethorn, Jester’s Arrows, or a Demon Scythe) to deal massive damage.
    • Vertical Arenas: Fight underground or create a vertical shaft with platforms to quickly maneuver around the worm’s body.
  • Brain of Cthulhu Tips:
    • First Phase: Defeat the floating Creepers first; piercing or wide-area weapons excel here.
    • Second Phase: Use accessories that increase mobility and focus on dodging illusions. Ranged or magic attacks from a safe distance are ideal.

4. Queen Bee

  • Where & When: Found in the Jungle’s bee hives. Summoned by breaking her larva.
  • Tips & Tricks:
    • Bee’s Knees: If you’ve beaten her before, her own bow, The Bee’s Knees, is an excellent weapon. Otherwise, a strong ranged weapon (Boomstick) or magic weapon like the Water Bolt works well.
    • Speed & Dodge: She’s fast and relentless. Wings aren’t available yet, so use grappling hooks and platforms for maneuverability.
    • Honey Pools & Heart Lanterns: Build a small arena with honey pools for passive regen, plus campfires and heart lanterns.

5. Skeletron

  • Where & When: Summoned by talking to the Old Man at the Dungeon entrance at night.
  • Tips & Tricks:
    • Focus on Hands First: Neutralize his hands to reduce incoming damage and attacks.
    • Weapons of Choice: The Night’s Edge sword or Demons Scythe if you’re a mage. Ranged users can opt for the Phoenix Blaster.
    • Arena: Simple horizontal platforms. Move back and forth to dodge the spinning head attack. Keep your buffs (Ironskin, Regeneration) active.

6. Wall of Flesh

  • Where & When: Summoned by throwing a Guide Voodoo Doll into lava in the Underworld. Defeating it unlocks Hardmode.
  • Tips & Tricks:
    • Long Bridge: Build a long platform bridge across the Underworld. This fight is a marathon; you’ll be running and shooting for a while.
    • Spread Firepower: Weapons like the Molten Fury Bow with Hellfire Arrows or the Water Bolt spell can shred through its hungry mouths and eyes.
    • Buff Up: Use potions (Ironskin, Swiftness, Regeneration) and equip accessories that increase movement speed. Aim for high DPS to kill it before you run out of bridge.

Early Hardmode Bosses

7. The Twins (Retinazer & Spazmatism)

  • Where & When: Summoned with a Mechanical Eye at night. They’re an advanced version of the Eye of Cthulhu.
  • Tips & Tricks:
    • Target One at a Time: Focus on Spazmatism (green one) first as its cursed flames are deadly.
    • Aerial Combat: Wings and grappling hooks help you stay mobile. Hallowed gear or Adamantite/Titanium gear is recommended.
    • Daedalus Stormbow: With Holy Arrows, it’s a top-tier weapon choice in early Hardmode.

8. The Destroyer

  • Where & When: Summoned with a Mechanical Worm at night. A massive mechanical worm boss.
  • Tips & Tricks:
    • Piercing Weapons Shine: The Daedalus Stormbow with Holy Arrows or a Star Cannon will melt its segments.
    • Platform Above Ground: Staying above ground, away from probes, allows continuous attacks. Heart lanterns and campfires for regen.
    • Avoid Being Surrounded: Constant movement prevents the Destroyer from boxing you in.

9. Skeletron Prime

  • Where & When: Summoned with a Mechanical Skull at night. A tougher Skeletron with multiple mechanical limbs.
  • Tips & Tricks:
    • Focus on Weapon-Specific Limbs: Take out the cannon and laser first to reduce incoming fire.
    • Circling Strategy: Fly or run in wide circles to dodge attacks.
    • Armor & Buffs: Adamantite, Titanium, or Hallowed armor plus well-chosen buff potions (Endurance, Lifeforce) makes all the difference.

Mid Hardmode Bosses

10. Plantera

  • Where & When: Found in the Underground Jungle after defeating all three mechanical bosses. Break a Plantera’s Bulb to summon.
  • Tips & Tricks:
    • Jungle Arena: Clear out a large open space in the jungle for better mobility.
    • Weapons & Gear: Use Chlorophyte gear and the Megashark or Uzi with Chlorophyte Bullets. Magic users can opt for the Rainbow Gun or Golden Shower.
    • Dodging & Positioning: Avoid getting cornered. Use hooks and wings to stay mobile during the enraged second phase.

11. Golem

  • Where & When: Summoned inside the Jungle Temple after defeating Plantera.
  • Tips & Tricks:
    • Arena Adjustments: Flatten out Golem’s chamber and add platforms for vertical dodging.
    • Strong Gear: Turtle or Beetle Armor (post-Plantera) works great. The Terra Blade, Possessed Hatchet, or Spectre Staff all excel here.
    • Avoid the Head Lasers: Dodge the head’s laser attacks and focus on the fists first, then finish off the body.

12. Duke Fishron

  • Where & When: Summoned by fishing in the Ocean with a Truffle Worm. Harder than Golem but available earlier if you’re bold.
  • Tips & Tricks:
    • Open Space Is Key: Fight in the Ocean biome with plenty of flying room.
    • High Mobility: You’ll need good wings, maybe the UFO mount. Spectre armor for mages or Shroomite for ranged are optimal.
    • Dodging Tornadoes & Charges: Stay above Fishron during its second stage; predict and dodge dash attacks. Healing potions and high DPS weapons are a must.

Late-Game & Endgame Bosses

13. Empress of Light (1.4+ Content)

  • Where & When: Summoned by killing a Prismatic Lacewing at night in the Hallow.
  • Tips & Tricks:
    • Perfect Dodging: The Empress demands quick reflexes. Learn her pattern of prismatic bolts, sun dance attacks, and always keep moving.
    • Daytime Challenge: Fighting her in daylight makes her drop the Terraprisma but also makes her attacks one-hit kills. Only attempt this when you know her patterns by heart.
    • Best Gear: Post-Golem gear or even endgame Lunar event gear helps. Accessories that boost dodges (Master Ninja Gear) or movement speed are invaluable.

14. Lunatic Cultist

  • Where & When: Appears at the Dungeon entrance after Golem is defeated, once you kill the four Cultists.
  • Tips & Tricks:
    • Clone Illusions: Attack the real Lunatic Cultist; hitting clones summons dangerous enemies. Wait until the clones line up to identify the real one.
    • High DPS & Range: Keep distance with a ranged weapon or powerful spells like Nebula Blaze (post events). Movement and caution are key.

15. Moon Lord

  • Where & When: Summoned after the Lunar Events, using the Celestial Sigil or automatically after defeating the last pillar.
  • Tips & Tricks:
    • High-End Gear: Endgame armor sets (Solar Flare, Nebula, Vortex, or Stardust) and top-tier weapons (Last Prism, Solar Eruption, Phantasm) are nearly mandatory.
    • Focus on Eyes: Defeat the eyes in hands and forehead before dealing with the core.
    • Nurse Strategy: Have a small box with the Nurse NPC nearby to heal mid-fight if needed. Heart statues, campfires, and heart lanterns maximize survivability.

16. Queen Slime (1.4+ Content)

  • Where & When: Summoned by using a Gelatin Crystal in the Hallow.
  • Tips & Tricks:
    • Similar to King Slime but with more mobility. She summons crystal slimes and takes to the air.
    • Aerial Combat: Good wings and mobility accessories help dodge her aerial charges.
    • Mid-Game Gear: Early Hardmode weapons like the Daedalus Stormbow still shine here.

17. Deerclops (Don’t Starve Crossover)

  • Where & When: Summoned in the Snow biome with a Deer Thing (crafted item).
  • Tips & Tricks:
    • Slower Pace: Deerclops has predictable sweeping attacks.
    • Ranged Advantage: Stay at medium range, dodge its projectiles, and keep firing.
    • Biome Advantage: Flatten the snowy terrain for easier movement.

Additional Tips for Boss Battles

  • Buffs & Potions: Always stock up on Ironskin, Regeneration, Endurance, Wrath/Rage, Lifeforce, and Heartreach potions. The difference in survivability and damage output is huge.
  • Accessories & Reforging: Reforge your weapons and accessories for optimal stats (e.g., “Menacing” for damage, “Warding” for defense).
  • Understand Patterns: Most bosses have tell-tale patterns. Practice makes perfect. Once you know how a boss moves, attacks, and transitions between phases, you can anticipate and outmaneuver them.
  • Community Insights: Don’t underestimate the power of collective knowledge. Joining the Terraria group on Absurd.link allows you to discuss strategies, ask for advice, and learn from others’ experiences. Take advantage of player-generated guides, videos, and discussions.

Join the Terraria Community on Absurd.link

Ready to share your boss battle triumphs, discover new strategies, or just hang out with fellow players who love Terraria as much as you do? Head over to Absurd.link’s Terraria Group—the gamer social network designed to connect passionate players.

  • Share your best loadouts: Show off your armor and accessories that made the Moon Lord tremble.
  • Discuss arena builds: Get tips on how to create the perfect arena for your next Duke Fishron showdown.
  • Find new friends: Team up with other Terrarians, exchange boss-fighting tactics, and maybe tackle expert-mode bosses together.

With these updated tips, you’re equipped to challenge every Terraria boss like a pro. Remember, every defeat is a lesson, and every victory brings you closer to unlocking the game’s best gear. Stay persistent, experiment with new strategies, and tap into the Absurd.link community for advice and camaraderie. By mastering Terraria’s bosses, you’ll be well on your way to earning the respect of fellow gamers and making the most out of every epic battle. Happy hunting!

Team Fortress 2 Class Roles and Tips

Team Fortress 2: A Comprehensive Guide to Classes and Gameplay in 2024

Team Fortress 2 (TF2), originally released in 2007, remains a cornerstone of team-based multiplayer gaming. Developed by Valve Corporation, this iconic game blends humor, strategy, and fast-paced action in a way that has captivated millions of players worldwide. With its vibrant art style, memorable characters, and intricate gameplay mechanics, TF2 has stood the test of time, continuing to evolve with updates, community contributions, and a loyal player base.

This guide delves into the latest details about Team Fortress 2, covering the unique roles of its nine classes, strategies for success, and recent updates that keep the game fresh and engaging.


The Current State of Team Fortress 2

As of 2024, Team Fortress 2 remains active, with consistent updates from Valve aimed at improving gameplay, patching bugs, and introducing community-created content. The game benefits from a thriving Steam Workshop community, which contributes maps, cosmetics, and other content that Valve periodically incorporates into official updates.

The “Summer 2023 Update” was a significant milestone, adding new maps, taunts, and over 100 community-created cosmetic items. It also included long-awaited bug fixes and performance improvements, showing Valve’s continued commitment to the game. TF2’s core gameplay remains intact, but these updates breathe new life into the experience, ensuring that both veterans and newcomers find something to enjoy.


The Nine Classes: Roles and Strategies

The backbone of TF2’s gameplay lies in its nine unique classes, each with distinct roles and playstyles. Success in TF2 hinges on understanding these classes and how they synergize with one another.

1. Scout

The Scout is the fastest class in TF2, making him ideal for capturing objectives and harassing enemies. His double jump ability allows him to navigate maps with unparalleled agility, while his Scattergun packs a punch in close-range combat. Scouts excel at flanking and disrupting enemy plans but require precise movement and aim to be effective.
Recent Strategy Tip: With updated maps favoring verticality, mastering double jumps to access unconventional routes can give your team a tactical advantage.


2. Soldier

A versatile class, the Soldier combines high damage output with excellent survivability. Armed with a Rocket Launcher, he can deal splash damage to groups of enemies or secure kills on isolated targets. The Soldier’s unique ability to rocket jump enables him to traverse maps quickly or reach high vantage points.
Role: Area control and consistent damage output.
Recent Strategy Tip: The latest balance patches have made rocket jumps less punishing, allowing new players to experiment with this mechanic more easily.


3. Pyro

Known for their flamethrower, Pyros are specialists in close-range combat and area denial. Their ability to airblast projectiles and extinguish burning teammates adds utility to their fiery arsenal. Pyros excel at spy-checking, ensuring that the enemy Spy cannot operate undetected.
Role: Ambushing and defensive support.
Recent Strategy Tip: With updates to flamethrower hit detection, Pyros now have a more reliable toolkit for duels and defending Engineers’ buildings.


4. Demoman

The Demoman thrives in area control and explosive damage. Armed with a Grenade Launcher and Stickybomb Launcher, he can trap choke points, destroy enemy defenses, and deal devastating damage to groups.
Role: Area denial and objective control.
Recent Strategy Tip: Stickybomb juggling (detonating bombs in midair) has become a meta strategy for countering mobile classes like Scouts and Soldiers.


5. Heavy

The Heavy is TF2’s tank, boasting the highest health pool and a Minigun capable of shredding enemies at close to medium range. Paired with a Medic, the Heavy becomes a near-unstoppable force.
Role: Frontline tank and damage dealer.
Recent Strategy Tip: Recent updates have emphasized the importance of positioning for Heavies; sticking close to cover and healers is key to survival.


6. Engineer

Engineers provide vital utility to their team by constructing Sentry Guns, Teleporters, and Dispensers. Sentries control key areas, while Teleporters ensure rapid reinforcements.
Role: Defensive support and map control.
Recent Strategy Tip: The addition of new map layouts has increased the importance of strategic Teleporter placements to maintain team mobility.


7. Medic

Medics are the lifeblood of any team, healing teammates and enabling pushes with their ÜberCharge ability. The Medic’s role requires excellent decision-making to prioritize healing targets and manage the timing of ÜberCharges effectively.
Role: Team sustain and push enabler.
Recent Strategy Tip: The improved Quick-Fix Medigun has gained popularity for its fast charge rate, making it ideal for mobile team compositions.


8. Sniper

The Sniper dominates sightlines with precise headshots, taking out high-value targets like Medics and Engineers. Positioning and map knowledge are critical for a Sniper’s success.
Role: Long-range eliminations and sightline control.
Recent Strategy Tip: Community-created maps with elevated sniper perches require mastery of quick-scoping and rapid repositioning to remain effective.


9. Spy

The Spy is the master of deception, capable of disguising as enemy players and eliminating key targets with a single backstab. Spies disrupt enemy strategies by sabotaging Sentry Guns and creating chaos in the backlines.
Role: Infiltration and high-value target elimination.
Recent Strategy Tip: The latest patches have improved disguise animations, making it harder for enemies to detect disguised Spies.


Game Modes and Community Updates

Team Fortress 2 offers a variety of game modes, including:

  • Capture the Flag: Teams vie to steal and secure the enemy’s intelligence briefcase.
  • Payload: One team pushes a cart to a destination while the other defends.
  • Control Points: Teams fight for dominance over key locations on the map.
  • King of the Hill: Teams compete to control a single point for a set amount of time.

Valve’s integration of community maps and modes has added even more diversity, with popular mods like “Mann vs. Machine” (a cooperative mode where players face AI robots) receiving consistent player attention.


Tips for New Players

  1. Experiment with Classes: Play each class to understand its strengths and weaknesses.
  2. Communicate: Use voice or text chat to coordinate with your team.
  3. Learn the Maps: Map knowledge is crucial for finding advantageous positions and routes.
  4. Practice with Bots: Start in offline practice to get a feel for the mechanics.

Join the Community

For more discussions, tips, and updates about Team Fortress 2, visit the Team Fortress 2 group on Absurd.link. Connect with other players, share strategies, and celebrate the enduring legacy of this timeless game.


Whether you’re a veteran or a newcomer, Team Fortress 2 continues to offer an unmatched blend of strategy, action, and fun. Dive into the game, pick your class, and join the fray—victory awaits!


New Report

Close