Team Coordination in League of Legends

Mastering the Art of Communication, Synergy, and Strategy on the Rift

In League of Legends, individual skill will only get you so far. No matter how perfectly you land skill shots or how hard you stomp your lane, winning the game ultimately comes down to teamwork. Whether you’re playing solo queue in ranked hell or coordinating with a five-man stack, team coordination can make the difference between a dominant victory or a frustrating defeat.

But let’s be real—League players aren’t exactly famous for flawless teamwork. In a game filled with ego, tilt, and questionable decision-making, coordinating with four random teammates can feel like an uphill battle. Still, understanding team dynamics, effective communication, and strategic playstyles can give you an edge over the chaos and help you carry games through sheer coordination.

So, whether you’re a macro mastermind or a low-Elo player wondering why your teammates never group for Baron, this guide will break down everything you need to know about team coordination in League of Legends.


1. Communication: The Backbone of Team Play

A. The Art of Pinging Without Tilting Your Teammates

Pings are the fastest and most effective way to coordinate with your team, but they’re also a double-edged sword—use them poorly, and you’ll tilt your team into oblivion.

Best Practices for Effective Pinging

Danger Pings (⚠️) for Enemy Movement – Don’t spam them mindlessly; one or two is enough to warn teammates.
Assist Me (❗) for Objectives – Use it to signal dragons, towers, or Baron calls.
On My Way (🚶) Before Engaging – Let teammates know you’re rotating or committing to a play.
Enemy Missing (❓) to Warn About Roams – Don’t assume everyone watches the minimap—remind them.

🚨 What NOT to Do:
Spam pings aggressively when a teammate makes a mistake—this only increases tilt.
Use Danger pings to mock teammates (e.g., “⚠️⚠️⚠️” on a jungler after a missed Smite).
Ping objectives after it’s already too late—timing matters.


B. Text Chat and Voice Comms: How Much is Too Much?

Should you use text chat in solo queue? Yes, but sparingly. If you type too much, you risk falling behind in farm or map awareness.

When to Use Text Chat:

Game Plan at the Start: “Our win condition is late game, let’s play safe early.”
Objective Calls: “We take Dragon after bot lane gets a kill.”
Cooldown Tracking: “Zed Flash down 10:40—punish him.”

🚨 What NOT to Do in Chat:
Blame Teammates Mid-Game – No one plays better when they’re tilted.
Demand Plays Constantly – “Gank my lane” spams never work.
Argue About Mistakes – Instead of “Why didn’t you peel?”, say “Let’s focus Jinx first next fight.”


2. Understanding Win Conditions and Team Comps

You can have the best mechanics in the world, but if you don’t understand your team’s win conditions, you’ll struggle to close out games.

A. Identifying Win Conditions

Every game has a path to victory—but it’s different based on the team composition.

Scaling vs. Early Game Comps – If you have Kayle, Kassadin, and Jinx, play defensively early and stall for late game. If you have Renekton, Lee Sin, and Lucian, you need early kills and objectives before you fall off.

Split-Push vs. Teamfight Comps – If you have a Fiora or Tryndamere, make space for them to push sidelanes while the rest of the team pressures other areas. If your team has Malphite, Orianna, and Miss Fortune, group for wombo combos.

Objective Control vs. Pick Comps – Teams with Thresh, Elise, and LeBlanc thrive on picking off enemies before big fights. Teams with Nunu, Janna, and Viktor play better controlling objectives.

🚨 Common Mistake:
Trying to play a scaling comp like an early-game comp or forcing teamfights with a split-push compmatch your playstyle to your team’s strengths.


3. Teamfight Coordination: How to Not Int Run It Down Mid

A. Positioning and Engaging

Front-to-Back Fighting – Tanks (Ornn, Sejuani) soak damage first, while ADCs and mages attack from the backline.
Flank and Disrupt – Assassins (Zed, Rengar) and divers (Hecarim, Diana) attack the backline at the right moment.
Peel for Carries – Supports and bruisers (Lulu, Tahm Kench, Braum) protect high-damage teammates.

🚨 Common Mistakes:
Engaging 1v5 Without Backup – A support Alistar flashing in alone is a one-way ticket to the death recap screen.
Diving a Tank Instead of a Carry – Focus squishy damage dealers before wasting cooldowns on a 5000 HP Cho’Gath.


4. Mid-Game & Late-Game Shotcalling: Who Should Lead?

If no one on your team takes the initiative, you risk getting out-macro’d by a team that does.

A. How to Shotcall Without Being Annoying

Ping a Plan, Not a Demand: Instead of “DO BARON!”, say “Baron after bot wave pushes.”
Recognize When to Group vs. Split: If your fed Tryndamere is split-pushing, don’t 4v5 fight without him.
Use Objective Timers to Your Advantage: Tracking Dragon & Baron spawns wins games.

🚨 Common Shotcalling Mistakes:
“JUST GROUP” When It’s Not the Right Play – Some comps don’t win teamfights and need to split-push instead.
Late Rotations – Calling Baron when your jungler is dead is a disaster waiting to happen.


Final Thoughts: Climbing with Team Coordination

Mastering team coordination in League of Legends takes game knowledge, awareness, and adaptability. Whether you’re stuck in Gold or climbing to Diamond, improving your communication, shotcalling, and teamfight execution will help you win more games, tilt less, and maybe—just maybe—keep your sanity intact.

Want to discuss more strategies, flame your teammates in peace, or share insane pentakill clips? Join the League of Legends group on Absurd.link and start the conversation!


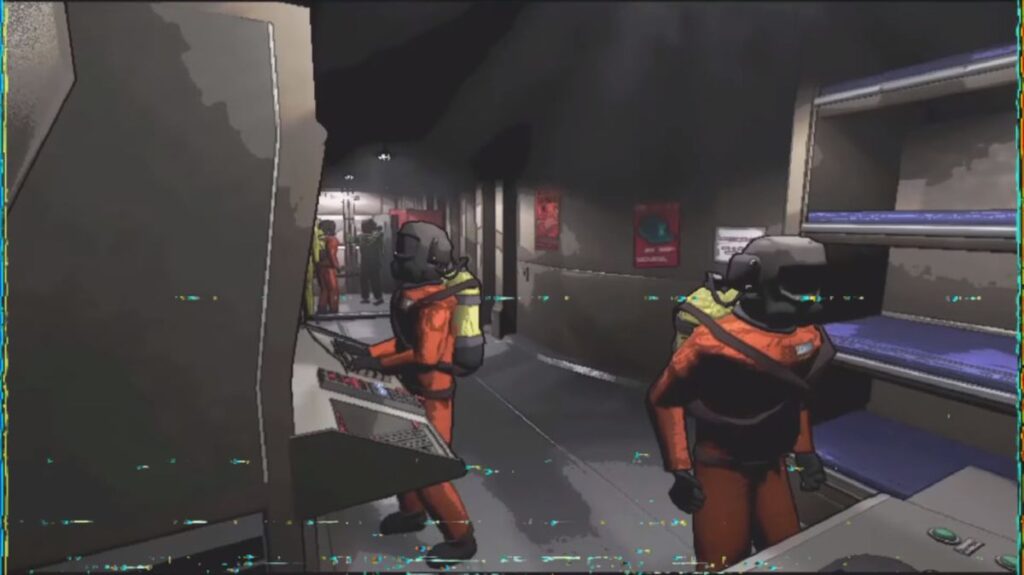
Mastering Teamwork in Lethal Company

Survive, Strategize, and Succeed with Coordinated Team Play

In the world of Lethal Company, survival isn’t just about individual skill—it’s about working together, making calculated decisions, and executing strategies as a team. In a game where every mission presents unpredictable dangers, environmental hazards, and terrifying encounters, having a strong and well-coordinated team can mean the difference between escaping with loot or succumbing to the horrors lurking in the shadows.

Unlike traditional competitive shooters or battle royales, Lethal Company emphasizes cooperative survival, requiring players to trust their teammates, communicate effectively, and adapt quickly. Whether you’re securing valuable scrap, outmaneuvering hostile creatures, or making a last-second escape, the key to success is team synergy.

This guide will explore the core elements of teamwork in Lethal Company, including communication tactics, role distribution, survival strategies, and tips for building a strong cooperative gaming group.


1. The Core Pillars of Teamwork in Lethal Company

Effective teamwork in Lethal Company is built on three foundational pillars:

A. Communication: The Lifeline of Survival

In Lethal Company, clear and concise communication is crucial for success. Without it, teammates can become separated, confused, or caught off guard by threats.

Best Practices for Effective Communication

Use Clear Callouts: If you spot a threat, don’t panic—communicate enemy locations and hazards calmly.
Keep It Concise: Avoid unnecessary chatter that can clutter team comms. Use direct phrases like:

  • “Monster near the main hallway.”
  • “Need backup at the entrance.”
  • “Generator room is clear—move in.”
    Establish Code Words: Quick, predefined signals can help teams react faster (e.g., “Red Light” means immediate retreat).
    Call Out Loot & Objectives: Keeping track of collected resources ensures efficient gameplay.

Pro Tip: Consider using an external voice chat (like Discord) for better clarity if in-game communication becomes difficult.


B. Role Distribution: Define Responsibilities for Maximum Efficiency

While Lethal Company doesn’t force players into predefined roles, successful teams assign responsibilities to ensure efficiency.

Essential Roles for an Effective Team

  1. The Scout (Recon Expert)
    • Moves ahead to locate threats and objectives.
    • Reports enemy patrol routes and safe zones.
    • Uses fast movement and stealth to avoid detection.
  2. The Collector (Scrap & Resource Manager)
    • Prioritizes looting valuable items while minimizing risk.
    • Keeps inventory organized and ensures resources are safely extracted.
  3. The Defender (Backup & Distraction Specialist)
    • Lures threats away when teammates are in danger.
    • Provides cover by blocking doors or creating safe zones.
    • Ensures safe retreat routes.
  4. The Navigator (Map Specialist & Support Coordinator)
    • Tracks progress, ensuring team members aren’t straying too far.
    • Guides teammates via comms or map layouts.
    • Manages objectives, ensuring no area is overlooked.

Rotating Roles: While some players naturally excel at specific tasks, teams should remain flexible and adapt roles based on the mission at hand.

Pro Tip: Before starting a mission, take 30 seconds to assign roles and discuss a basic plan—this can prevent unnecessary confusion mid-game.


C. Strategic Adaptability: Reacting to Unpredictable Situations

No two games of Lethal Company are exactly the same, meaning teams must adapt based on the enemies encountered, map conditions, and available resources.

Situational Strategies for Survival

Silent Movement is Key – Running and making unnecessary noise can alert hostile entities. Always be mindful of sound.
Split Up, But Stay Connected – Cover more ground by splitting into pairs, keeping radio updates frequent.
Use Objects for Distraction – Throwing items can redirect enemy attention, creating safe passage for teammates.
Know When to Retreat – If things go south, cut losses and focus on extraction instead of greedily collecting loot.

Exit Strategy: Always establish a clear escape plan at the beginning of the match, so when things escalate, no time is wasted figuring out a way out.

Pro Tip: If a teammate is down, assess whether saving them is worth the risk—sometimes, it’s better to escape with what’s already secured than to risk a full wipe.


2. Strengthening Team Bond & Cohesion

While Lethal Company is about in-game teamwork, the best teams build strong connections outside the game as well.

A. Playing with a Consistent Team

✔ Sticking with the same group of players over multiple sessions improves synergy.
✔ Over time, teammates will learn each other’s strengths and weaknesses, making coordination smoother.

B. Understanding Playstyles & Adapting

✔ Some teammates may be risk-takers, while others prefer methodical play. Recognizing these tendencies helps balance decision-making.
Trust & Respect are essential—blaming teammates for mistakes only creates friction. Instead, focus on learning and improving as a team.

C. Engaging with the Lethal Company Community

Joining a dedicated group, like Absurd.link’s Lethal Company group, allows players to meet like-minded teammates, exchange strategies, and form long-term gaming alliances.


3. Advanced Tactics for Competitive Play

For players looking to optimize their teamwork and perform at the highest levels, consider these advanced tactics:

Bait-and-Switch Maneuvers – One teammate attracts enemy attention while others quickly complete objectives.
Sacrificial Play (Only When Necessary) – In extreme cases, one player may need to draw danger away to allow teammates to secure an escape.
Game Awareness Over PanicStay calm under pressure—panicking often leads to avoidable mistakes.
Replay Analysis – Reviewing past gameplay (via recorded sessions) can help identify weak spots in coordination and improve decision-making.


Final Thoughts: The Power of Teamwork in Lethal Company

In Lethal Company, success isn’t about how skilled one player is—it’s about how well a team works together. A coordinated group will always outperform disorganized individuals, no matter how mechanically skilled they are.

By mastering communication, assigning roles efficiently, adapting to challenges, and strengthening team bonds, players can not only survive in Lethal Company but thrive.

For those looking to find dedicated teammates, share strategies, and take teamwork to the next level, joining a like-minded community is key. Connect with other players and build lasting alliances in the Lethal Company group on Absurd.link.

The question is—will you work together, or perish alone?

Adaptive Survival Techniques in Once Human

Mastering Flexibility, Resourcefulness, and Resilience in a Post-Apocalyptic World

Survival isn’t just about brute force—it’s about adapting, strategizing, and making the best of any situation. In the harsh, ever-changing world of Once Human, survival is dictated by how well you can adjust to unpredictable environments, utilize scarce resources, and maintain a strong mindset when faced with overwhelming threats. Whether you’re scavenging for supplies, fending off mutated horrors, or navigating extreme weather conditions, adaptability is the key to staying alive.

In this comprehensive survival guide, we’ll explore effective adaptive survival strategies to help you thrive in Once Human—whether you’re exploring solo or strategizing with a group.


1. Embracing Flexibility: Adapting to Ever-Changing Threats

One of the core elements of survival in Once Human is flexibility—the ability to change tactics on the fly depending on your surroundings, available resources, and immediate dangers. Unlike traditional survival games, where patterns can be memorized, Once Human presents dynamic challenges that require quick thinking and decisive action.

Changing Playstyles on the Fly

  • Stealth vs. Combat: Sometimes avoiding a fight is smarter than engaging. If you’re outgunned, use shadows, tall grass, and silent movement to bypass threats.
  • Nomadic vs. Settled Survival: If a region becomes too dangerous or resources run dry, relocating may be the best option.
  • Solo vs. Group Strategy: Playing alone means you need to be extra cautious and methodical. In groups, teamwork and communication become crucial.

Environmental Adaptation

Each biome in Once Human comes with unique survival challenges:

  • Urban Ruins: Buildings offer protection and loot but may be infested with hostile entities.
  • Swamps and Marshes: Difficult terrain slows movement but provides water and rare materials.
  • Deserts: Resource scarcity forces you to plan hydration and food supply carefully.
  • Toxic Zones: Limited time exposure means bringing protective gear and planning quick in-and-out scavenging runs.

Pro Tip: Adapt your survival kit based on where you plan to explore—pack lighter for high-mobility runs, and bring reinforcements when exploring high-danger zones.


2. Resourcefulness: Making the Most of What You Have

In Once Human, waste is death—every item has value, and survival depends on how well you repurpose and utilize available materials. Knowing how to craft, recycle, and manage inventory efficiently can turn the tides in your favor.

Scavenging Like a Pro

  • Search Abandoned Structures: Buildings hold valuable loot, but be wary of lurking dangers.
  • Check Hidden Caches: Survivors before you may have left supplies stashed away.
  • Loot Enemies: Some hostile NPCs or creatures drop rare crafting materials.

Improvised Crafting & Upcycling

  • Turn Scraps into Weapons: Broken pipes, wooden planks, and glass shards can be used for self-defense.
  • Reinforce Gear with Salvaged Parts: Patch up armor using scavenged metal or torn cloth.
  • Create Makeshift Tools: If you lack proper equipment, craft rope, bandages, or traps from basic materials.

Efficient Inventory Management

  • Prioritize Multi-Use Items: Tools that serve multiple purposes (e.g., a machete for combat and chopping wood) save space.
  • Use Storage Wisely: Set up stash points to minimize risk of losing valuable loot.
  • Carry Emergency Rations: Water and food should always be part of your core inventory.

Pro Tip: If you’re over-encumbered, drop non-essentials but mark their location—you never know when you’ll need them later.


3. Tactical Survival: Outsmarting Enemies & Managing Combat

Combat in Once Human is brutal, and without proper planning, you can easily be overwhelmed. Success depends on how well you analyze threats, control engagements, and use the environment to your advantage.

Understanding Enemy Behavior

  • Mutated Creatures: Some hunt by sound, others by movement—learn their patterns to evade or fight effectively.
  • Hostile Survivors: Not everyone in Once Human is friendly. Assess threats before engaging.
  • Environmental Hazards: Sometimes the terrain itself is your greatest enemy—watch for collapsing structures, quicksand, or radiation zones.

Combat Strategy & Engagement Rules

  • Fight on Your Terms: Never engage enemies without an exit strategy.
  • Use Cover & High Ground: Avoid open areas where you can be flanked or surrounded.
  • Aim for Weak Points: Some enemies have exposed areas that take extra damage.
  • Conserve Ammo: Firearms are powerful but should be used strategically.

Pro Tip: Engage only when necessary—stealth and misdirection can often be more effective than direct combat.


4. Psychological Resilience: The Mindset of a Survivor

Survival isn’t just physical—it’s mental and emotional endurance. A calm and focused mindset can make all the difference in high-stress situations.

Managing Stress & Fear

  • Stay Calm Under Pressure: Panic leads to bad decisions and wasted resources.
  • Assess Before Acting: Before rushing into a fight or looting an area, scan for dangers.
  • Keep Moving Forward: Dwelling on mistakes (e.g., losing supplies or taking damage) won’t help—adapt and rebuild.

Surviving Solo vs. In a Group

  • Solo Play: Requires patience, extreme caution, and mastery of self-sufficiency.
  • Group Play: Requires trust, coordination, and defined roles (scavenger, defender, medic, builder, etc.).

Building a Survivor Network

No one survives alone forever. Finding allies and forming groups greatly enhances long-term survival:

  • Trading Supplies: Exchange materials to ensure survival efficiency.
  • Collaborative Base Building: Defend against threats more effectively.
  • Group Hunts & Expeditions: Cover more ground safely.

Pro Tip: Join the Once Human community on Absurd.link to find allies and share survival strategies.


5. Planning for Long-Term Survival

Short-term survival is one thing, but building a stable life in Once Human requires long-term preparation.

Base Building Essentials

  • Find a Defensible Location: High ground or reinforced structures work best.
  • Secure Food & Water: Set up farming, fishing, or water collection.
  • Stockpile Essentials: Keep reserves of medical supplies, fuel, and emergency gear.

Sustainable Resource Management

  • Hunt & Gather Wisely: Avoid over-hunting or depleting local resources.
  • Learn to Craft & Repair: Gear durability matters—fix what you can instead of constantly replacing it.

Adapting to Game Updates & New Challenges

  • Stay Updated on Patch Notes: Mechanics change, and new survival elements can shift the meta.
  • Experiment with New Strategies: Don’t get stuck in old habits—evolve with the game.

Final Thoughts: Thriving, Not Just Surviving

Survival in Once Human is more than just staying alive—it’s about learning, adapting, and ultimately thriving. Mastering flexibility, resourcefulness, tactical survival, psychological resilience, and long-term planning will ensure that you’re always prepared for the unknown.

If you’re serious about becoming a top-tier survivor, connect with other players, exchange strategies, and build alliances by joining the Once Human group on Absurd.link.

The apocalypse waits for no one—how will you survive?

Dead by Daylight Strategies: Mastering the Fog for Survivors and Killers

Dead by Daylight is a high-stakes game of cat and mouse, where every move could mean the difference between a daring escape or a brutal sacrifice. As an asymmetrical multiplayer horror experience, the game constantly evolves with new Killers, perks, mechanics, and meta shifts. Whether you’re a Survivor trying to outwit the Killer or a Killer looking to systematically eliminate your prey, understanding key strategies is crucial.

In this updated survival guide, we’ll break down essential tips for both sides, explore how to adapt to recent changes, and help you climb the ranks in Dead by Daylight.


Survivor Strategies: Outsmart the Killer and Escape the Trial

Survivors have one job: repair generators, open the gates, and escape while avoiding the Killer’s grasp. That sounds simple enough—until you’re being chased down by a relentless Michael Myers or caught off guard by The Knight’s guards. To improve your survival rate, focus on these core strategies:

1. Play Smart, Not Reckless

Survivors need to balance stealth, teamwork, and efficiency to outplay the Killer. Here’s how you can increase your odds of survival:

  • Don’t sprint unless necessary – Running leaves scratch marks that the Killer can track. Move cautiously when near objectives.
  • Crouch-walking or walking removes scratch marks – Useful for juking the Killer or hiding effectively.
  • Use obstacles wisely – Vaulting windows, dropping pallets, and hugging walls can throw the Killer off your trail.
  • Don’t always drop pallets immediately – Some Killers bait pallet drops early. Fake a vault or hesitate for a second before committing.

2. Master Map Awareness

Understanding the layout of each map and knowing where key locations are (like pallet loops, vault points, generators, and totems) can drastically improve your survivability.

  • Killer Shack is your best friend – This structure often has a strong vault location and a reliable loop to stall time.
  • Look for long jungle gyms – Structures with strong window vaults or pallet placements provide excellent chase potential.
  • Don’t 3-gen yourself – Avoid leaving generators clustered together as the last three remaining; Killers can defend them easily.

3. Generator Efficiency and Teamwork

  • Split up when repairing generators – If multiple Survivors work on different generators, the match progresses faster.
  • Use Prove Thyself – This perk increases repair speed when working with others, but beware of making yourselves easy targets.
  • Stay alert when a teammate is hooked – If two people rush to save while others aren’t on gens, progress slows down.
  • Leave generators at 99% – Against Killers with Pop Goes the Weasel or Pain Resonance, delaying a full repair can be beneficial.

4. Chase and Looping Tactics

Survivors need to know how to stall the Killer, buying valuable seconds for teammates.

  • Keep Killers guessing at loops – Double back at key windows and use “fake vaults” to trick the Killer.
  • Understand when to pre-drop pallets – Against high-mobility Killers like The Blight or The Spirit, sometimes pre-dropping is the best option.
  • Use Decisive Strike and Off The Record – If tunneling is a problem, these perks help counter repeated targeting.

5. Stealth and Hiding Tips

  • Avoid hiding in lockers – Good Killers rarely check them unless you’re obvious about it.
  • Use objects for line-of-sight blocking – Breaking vision forces Killers to guess your direction.
  • Stay unpredictable – Mixing up your escape routes prevents Killers from reading your movement.

6. Endgame Survival

  • Body block at exit gates – If a teammate is injured and trying to escape, a well-timed body block can ensure their survival.
  • Don’t rush the unhook at endgame – Some Killers wait near hooks for easy downs. Be patient and coordinate saves.

Killer Strategies: Become an Unstoppable Force

Playing as the Killer isn’t just about chasing down Survivors—it’s about controlling the map, managing pressure, and forcing mistakes. Whether you’re playing a mind-game-heavy Killer like The Trickster or a powerhouse like The Oni, these strategies will elevate your playstyle.

1. Map Control and Generator Pressure

The best Killers control the trial instead of endlessly chasing Survivors.

  • Always pressure multiple Survivors – If one gets away, apply pressure elsewhere instead of tunnel-visioning.
  • Kick gens when possible – Perks like Call of Brine, Pain Resonance, and Jolt help slow down gen progression.
  • Be mindful of 3-gen setups – Leaving three close generators for the late game can ensure victory.

2. Master Tracking and Mind Games

  • Read Survivor movement – High-level players bait loops, fake vaults, and try to predict your swings.
  • Utilize red stain mind games – Walking backward around a corner or moonwalking can trick Survivors into unsafe movements.
  • Listen for sounds – Injured Survivors make noise, and scratch marks disappear quickly.

3. Chase Strategy and Loop Mind Games

  • Vault windows if needed – Some Killers have faster vault speeds than Survivors.
  • Break pallets efficiently – Perks like Spirit Fury and Enduring can help against pallet spamming Survivors.
  • Corner mind games – Instead of following a Survivor’s path exactly, cut them off using prediction.

4. Hooking and Pressure Tactics

  • Hook Survivors in high-traffic areas – Placing them near generators forces teammates to leave objectives.
  • Slugging can be useful – If two or more Survivors are nearby, downing multiple can shift the advantage in your favor.
  • Don’t overcommit to one Survivor – If a chase lasts too long, switch targets.

5. Utilizing Killer-Specific Strengths

Every Killer has a unique power, and using it properly can make you nearly unstoppable.

  • The Nurse – Mastering her blinks lets you bypass loops completely.
  • The Blight – Learning hug-tech and movement angles allows you to execute impossible hits.
  • The Hag – Placing phantasm traps at loops punishes Survivors who try to run.
  • The Spirit – Predicting Survivor movements while phasing takes practice but makes her terrifying.

6. Perk Synergies and Loadouts

A well-built perk loadout can amplify a Killer’s power.

  • Meta Perks (2024-2025 Update):
    • Pain Resonance – Instant gen regression.
    • Scourge Hook: Floods of Rage – Reveals Survivor auras after hooks.
    • Nowhere to Hide – Highlights Survivors after kicking gens.
    • Sloppy Butcher – Slows down healing.

Pro Tip: Adapt your build based on the team you’re facing. If they rely on healing, use Sloppy Butcher. If they repair gens quickly, go for regression perks.


Final Thoughts: Adapt and Overcome

Dead by Daylight is a game where every match is different, requiring quick thinking, adaptability, and mastery of mechanics. Whether you play as a Survivor dodging Killers or a Killer eliminating the opposition, strategy is what separates the best from the rest.

If you’re looking to improve your gameplay, learn new strategies, and connect with fellow players, join the Dead by Daylight group on Absurd.link. Share your experiences, discuss tactics, and stay ahead of the ever-changing meta.

The Fog awaits. Are you ready to survive… or hunt?

Throne and Liberty Combat Strategies: Master the Art of Battle

In Throne and Liberty, combat is not merely about brute force; it’s about strategy, precision, and understanding the nuances of battle. Whether you’re a seasoned commander or a new adventurer stepping into this epic MMO world, mastering combat strategies can make the difference between glorious victory and crushing defeat.

From building the perfect unit composition to leveraging terrain and understanding your enemy, this guide covers everything you need to dominate the battlefield in Throne and Liberty.


Understanding Unit Composition: Build a Balanced Army

The foundation of any successful combat strategy lies in your unit composition. Throne and Liberty emphasizes a diverse range of units, each with unique strengths, weaknesses, and synergies. Properly assembling your forces is crucial for handling different scenarios effectively.

Key Unit Types and Their Roles

  1. Infantry:
    • Strengths: Frontline units capable of absorbing damage and holding positions.
    • Weaknesses: Vulnerable to heavy AoE attacks and ranged fire.
    • Best Use: Use infantry to anchor your formation, block chokepoints, or protect ranged units.
  2. Cavalry:
    • Strengths: High mobility and devastating charges.
    • Weaknesses: Struggles in tight spaces and against spear-wielding units.
    • Best Use: Flanking maneuvers, harassing enemy backlines, and chasing down retreating foes.
  3. Ranged Units:
    • Strengths: Long-distance attacks that can thin enemy ranks before they engage.
    • Weaknesses: Fragile and ineffective in close combat.
    • Best Use: Position on high ground or behind infantry for maximum effectiveness.
  4. Support Units:
    • Strengths: Healing, buffs, and utility abilities.
    • Weaknesses: Often low damage output and high priority targets for the enemy.
    • Best Use: Keep them near critical units like infantry or cavalry to sustain your army during prolonged battles.

Pro Tip: Experiment with different unit combinations to find a setup that complements your playstyle. For example, pairing heavy infantry with mobile cavalry creates a strong balance of defense and offense.


The Power of Terrain: Turn the Battlefield to Your Advantage

Terrain is one of the most important yet overlooked aspects of combat in Throne and Liberty. Understanding and leveraging the landscape can often give you the upper hand, even against a stronger opponent.

Key Terrain Strategies

  1. High Ground Advantage:
    Units positioned on elevated terrain gain better visibility and improved attack angles. Ranged units especially benefit from this, allowing them to rain down damage with increased accuracy.
  2. Chokepoints:
    Narrow pathways like bridges or mountain passes can limit enemy movement and force them into predictable formations. Position your infantry to hold these points while your ranged units and cavalry do the damage.
  3. Cover and Obstructions:
    Use trees, rocks, or other natural features to shield your units from ranged attacks. This is especially useful for advancing toward enemy positions.
  4. Ambush Opportunities:
    Hide units in forests or other areas of concealment to set up devastating ambushes. Timing is everything—strike when the enemy least expects it.

Pro Tip: Always scout the battlefield before engaging. Identifying advantageous positions ahead of time can drastically improve your chances of success.


Scouting and Countering Your Opponent

Knowledge is power, and understanding your opponent’s composition and strategy is key to victory.

Scouting for Intel

Before charging into battle, send out scouts to gather information about the enemy:

  • What types of units are they fielding?
  • Are they spread out or concentrated in one area?
  • Are there weaknesses in their formation, such as exposed ranged units or poorly protected supports?

Countering Enemy Strategies

Once you’ve gathered intel, adapt your strategy to exploit their vulnerabilities:

  • Against Heavy Infantry: Use AoE attacks or ranged units to wear them down before engaging.
  • Against Cavalry: Position spear-wielding units to counter charges and protect your flanks.
  • Against Ranged Units: Close the gap quickly with fast-moving units or deploy shields to block incoming fire.

Pro Tip: Pay attention to the abilities and formations of enemy commanders. Neutralizing their key units early can disrupt their entire strategy.


Teamwork and Coordination: The Key to Victory

In Throne and Liberty, no battle is won alone. Effective communication and synergy with your allies can turn the tide of even the most challenging encounters.

Key Elements of Teamwork

  1. Coordinating Attacks:
    Synchronize your efforts to overwhelm the enemy. For example, have your infantry engage the frontline while your cavalry flanks and your ranged units provide support.
  2. Dividing Responsibilities:
    Assign specific tasks to each player, such as one handling crowd control while another focuses on taking out high-priority targets.
  3. Using Abilities Synergistically:
    Combine buffs, debuffs, and AoE abilities for devastating effects. For example, use a slowing debuff to trap enemies in a damaging AoE zone.

Pro Tip: Use voice chat or quick pings to maintain clear communication during chaotic battles.


Adaptability: Stay Flexible in the Heat of Battle

Even the best-laid plans can fall apart in the chaos of combat. Being able to assess the situation and adapt quickly is often what separates good players from great ones.

Tips for Staying Adaptable

  • Watch the Flow of Battle: Constantly monitor the battlefield to identify threats or opportunities.
  • Adjust Formations: If your frontline starts to crumble, pull back and regroup. Conversely, if the enemy is retreating, push forward aggressively.
  • React to Enemy Tactics: If the enemy shifts strategies, such as targeting your support units, adjust your priorities to protect them.

Pro Tip: Always have a backup plan. If Plan A fails, Plan B should be ready to implement without hesitation.


Mastering the Art of Combat in Throne and Liberty

To truly master combat in Throne and Liberty, you need to combine multiple elements—unit composition, terrain utilization, intel gathering, teamwork, and adaptability. By honing these skills and applying them with precision, you’ll not only achieve victories on the battlefield but also establish yourself as a force to be reckoned with in the realm.

Ready to put these strategies into action? Join the Throne and Liberty group on Absurd.link to connect with other players, share strategies, and form alliances. Together, you’ll dominate the battlefield and carve your legacy in the world of Throne and Liberty.

The battlefield awaits. Will you rise to the challenge?


New Report

Close